Note: Affiliate links may be used in this post. When you buy through my affiliate links I may earn a commission at no extra cost to you. Full disclosure here.
How to Start a Craft Blog
This guide will teach you how to start a craft blog in five easy steps!
If you love everything crafty and DIY-related, starting a craft blog is perfect for you. Not only can you share your crafty endeavors with the world and inspire others, but you can also make money doing what you love!
Starting a craft blog is also a great way to document your crafting journey.
And did I mention you can get paid to do it?!
Blogging has a very low investment (it costs just $2.95 a month for a domain name and hosting with Bluehost) but a high potential for profit.
Are you ready to learn how to start a craft blog? Let’s get into it!
Step 1: Choose a Niche
Your niche is simply the topic you blog about. Crafting is already a niche in itself, but you may want to narrow your niche even further (AKA choosing a micro niche) in order to stand out from the crowd and differentiate yourself.
Here are some ideas for craft blog niches:
- Kids’ crafts
- Cricut crafts
- Scrapbooking
- DIY jewelry
- Seasonal crafts
- Drawing/painting
- Knitting
- Crocheting
- DIY home decor
- Woodworking
The options are honestly endless! If there’s something crafty that you love to do, chances are, there are other people interested in it too.
You can also choose a couple of these craft niches to focus on, you don’t have to pick just one. This is just to give you some ideas and inspiration!
Related: What to Blog About: 150+ Profitable Blog Niche Ideas
Step 2: Choose a Name
After you have decided on your niche, it’s time to choose a name for your craft blog! Your domain name is your blog’s address on the Internet.
It’s important to choose a good name, because it’s the first impression you will have on visitors to your blog. (And it’s hard to change later!)
Related: Craft Blog Names: Ideas & Examples
Here are some tips for how to pick a domain name for your craft blog:
- Make your name easy to spell and say. Don’t use misspelled words, numbers, or hyphens in your domain name. All of these things will make your name a lot more confusing and harder for people to remember.
- Make sure that the .com of your chosen name is available. Try to avoid alternative domain name endings like .net or .co because they are less common, harder to remember, and less trustworthy.
- Make it craft-related. For example, Sew Some Stuff or One Little Project.
- Incorporate your niche. If you are starting a craft blog with a more narrow niche (such as just crochet projects), then incorporate that into your blog name! This helps your target audience know exactly what your blog is about.
- Don’t overthink it. Try not to spend too much time on this step or worry about picking the “perfect” domain name. Chances are, whatever name you pick will grow on you and start to feel like a great fit.
Related: How to Choose a Blog Name
If you can’t decide on a name yet, that’s okay! You can come back and choose one later after you sign up for web hosting with Bluehost.
Step 3: Get Web Hosting
If you want to make money as a blogger, you will need to have a self-hosted blog. This means that you own all of your content and your blog is totally yours, as opposed to using a hosted platform such as Blogger, Wix, WordPress.com, etc.
Even if you are not a very technical person, setting up web hosting is extremely simple and only takes a few minutes.
First, you will need to choose a web host.
The web hosting company I use and recommend is Bluehost.
Here are a few reasons why I like Bluehost:
- They have some of the most affordable web hosting plans out there.
- You can get your domain name for free with them (as opposed to paying $15 to $20 with an outside company.)
- Their service is reliable and robust, so you will never have to worry about your website going down or loading slowly.
- Many of the most successful bloggers I know use Bluehost.
- They have great customer support and I have always had my questions answered quickly whenever I needed help.
Bluehost has very generously offered hosting packages starting at just $2.95 a month for readers of Blogging Her Way, along with a FREE domain name.
To get this special pricing, just be sure to use any Bluehost link in this article!
Here’s how to set up web hosting with Bluehost:
1. Click here and then click the “Get Started” button:
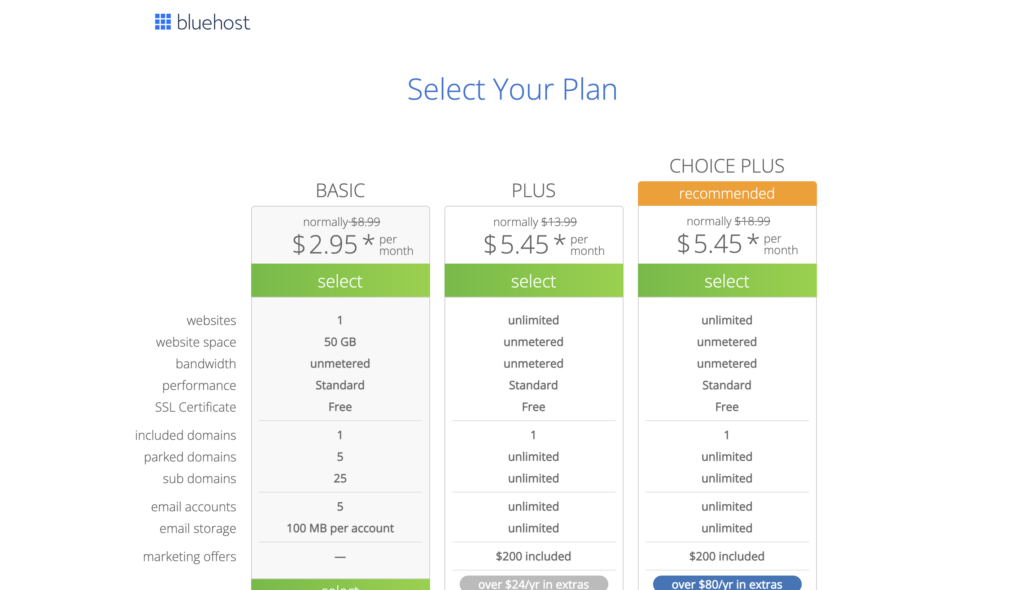
2. Select your hosting plan
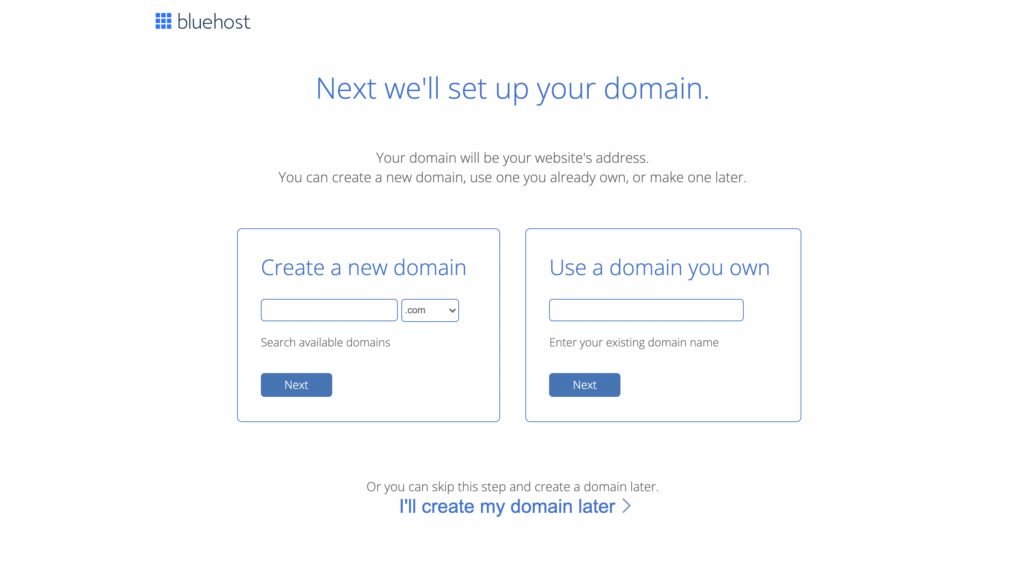
3. Put in your domain name
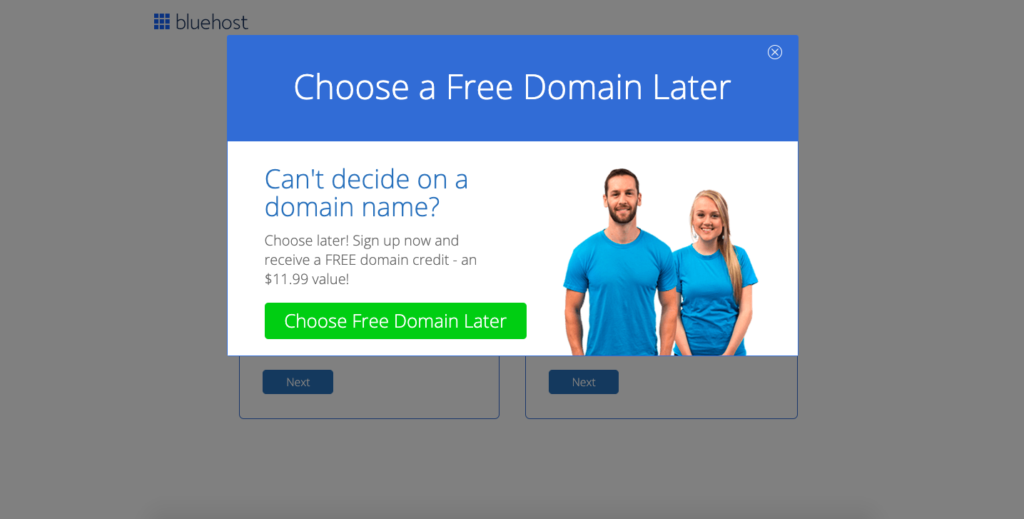
Select this option and you can go ahead and set up your blog now, then use the free credit to buy your domain name later.
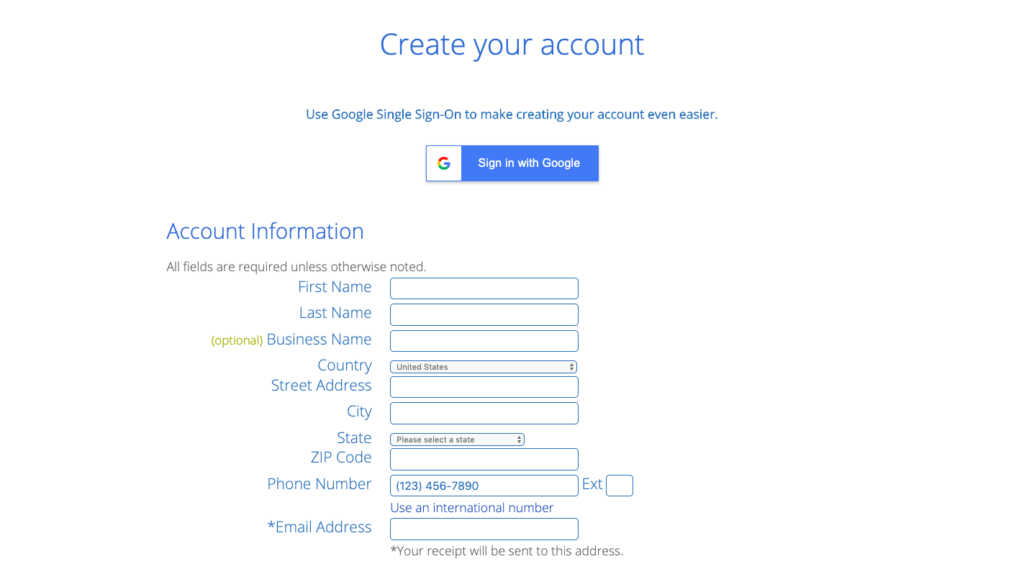
4. Create your hosting account
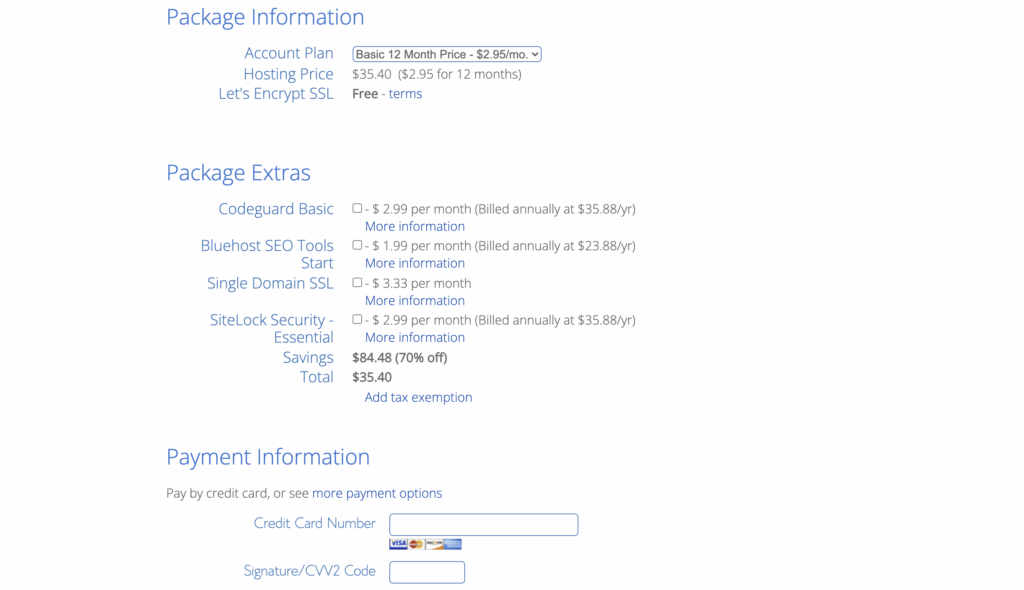
5. Choose your package and pay
I recommend the 12-month plan for $2.95 a month, for a total cost of $35.40 for the year. But you can also choose a 24-month or 36-month plan.
6. Congrats, you’re done!
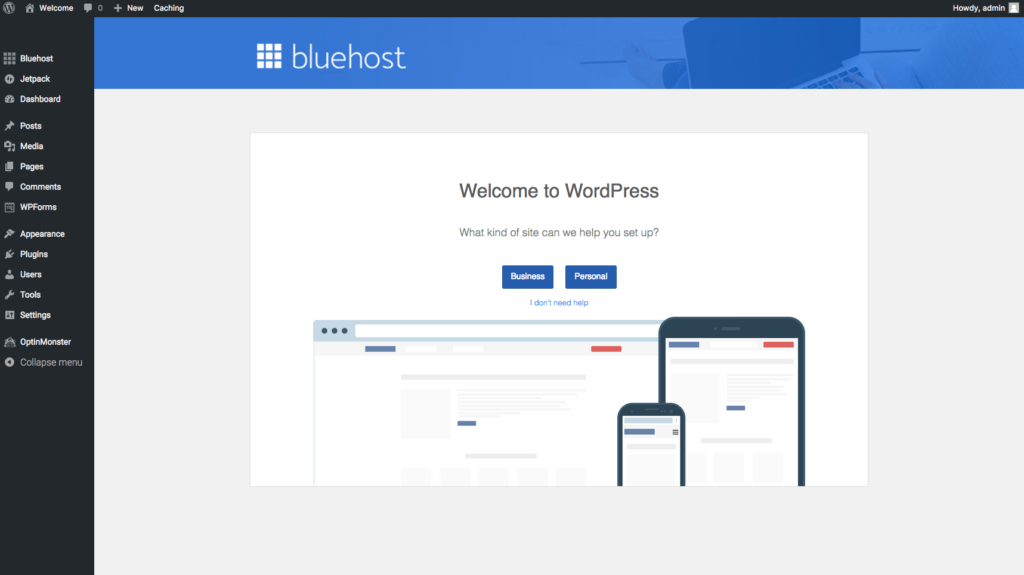
Now you’re all set! Bluehost will automatically install WordPress for you.
What exactly is WordPress? WordPress is the content management platform that your blog will run on. Your WordPress dashboard is where you will go to edit the look of your blog, write blog posts, upload images, etc.
It’s extremely easy to use, even if you’re a total beginner.
Step 4: Design Your Blog
Now it’s time for the fun part – designing your blog!
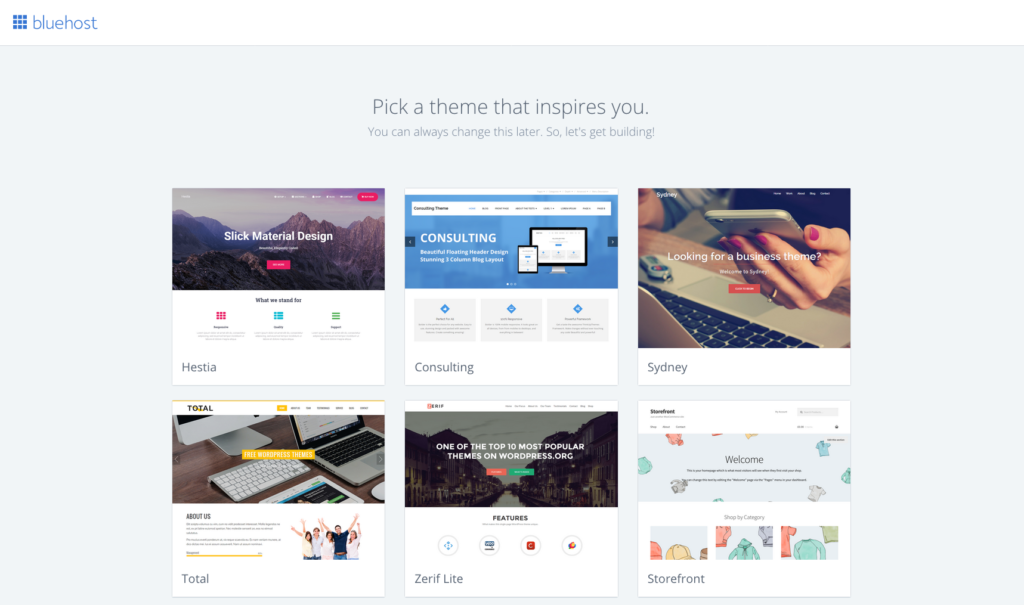
When you log in to your WordPress dashboard for the first time, you will be prompted to go ahead and choose a theme for your blog:
You can pick one of these default themes if you want, but I don’t recommend it.
For one, the majority of these free default themes are not designed with bloggers in mind. Most are designed for business websites.
Additionally, choosing a premium theme over a default theme will make your blog look more professional right from the start.
Here are the benefits to choosing a paid theme for your blog:
- They come with step-by-step set-up instructions
- You will have access to customer support from the theme creator.
- Paid themes come with crucial features like a mobile responsive design and customization options.
- Your blog will look prettier and more professional.
Here are some great themes that are perfect for craft bloggers:
Installing your WordPress theme
To install your theme, go to Appearance > Themes in the lefthand menu of the WordPress dashboard, which looks like this:
Then simply upload your theme file and install it.
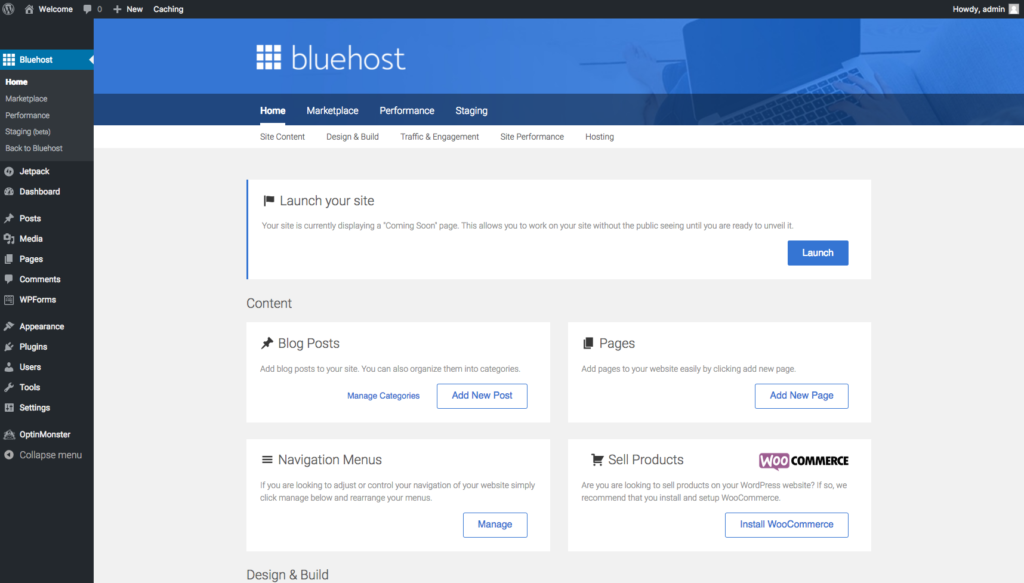
Once you have installed your theme and are happy with the way everything looks, you can go ahead and launch your blog! Until you follow this step, your blog will just display a “Coming Soon” landing page.
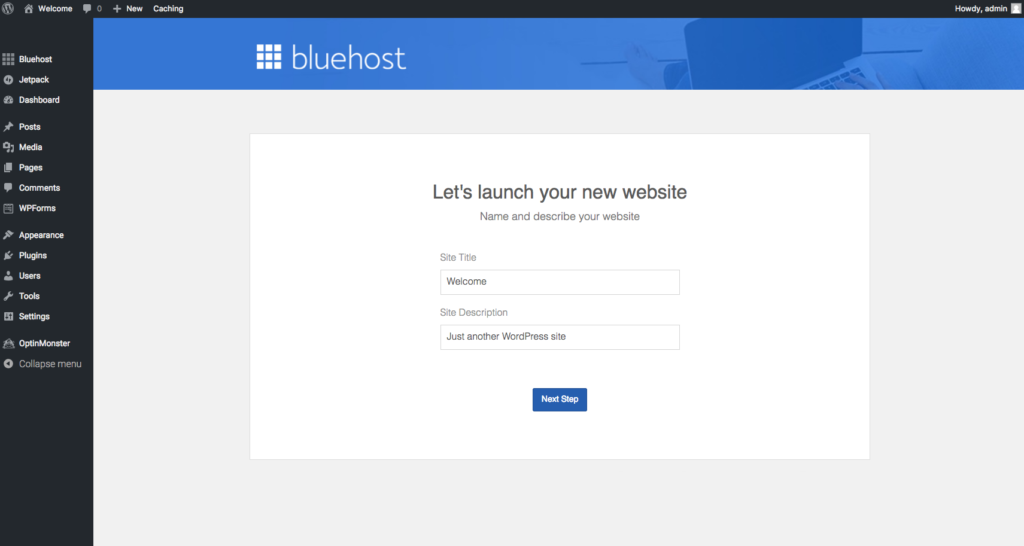
To launch, go to the Bluehost menu on the top left of your WordPress dashboard:
All you have to do is fill in this info and you’re good to go:
Congrats! Your craft blog is now live.
Step 5: Start Blogging!
Once you have launched your blog, it’s time to write your first blog post.
There are a lot of things you can write about as a craft blogger. Here are some helpful ideas to help you get started:
- Holiday craft ideas
- DIY crafts you can make in under an hour
- Your essential crafting supplies
- Unique handmade gift ideas
- A step-by-step crafting tutorial
For more craft blog post ideas, check out this list of blog post ideas for craft bloggers to get some more inspiration for what to write about.
How Craft Blogs Make Money
There are many ways to make money as a blogger. As a craft blogger, here are a few of the most popular ways to make money from your blog:
Affiliate Marketing
Affiliate marketing is one of the best ways to make money blogging. As an affiliate for a company, you earn a commission every time someone makes a purchase through your unique affiliate link. You can literally get paid for recommending products you already use and love to your readers!
For more tips on affiliate marketing, read my guide to making money with affiliate marketing or sign up for my free list of affiliate programs for bloggers.
Display Ads
Display ads are another popular way to make money as a blogger.
Once you have enough traffic to your blog, you can join an ad network like Monumetric (which requires 10,000 monthly page views) or Mediavine (which requires 50,000 monthly sessions.)
These networks will display ads on your site and pay you based on RPM (revenue per one thousand impressions.) Depending on traffic, many bloggers earn anywhere from a few hundred to thousands of dollars from ads each month.
Selling Products
Craft bloggers can also make money selling their own products.
And it doesn’t have to be a physical craft product, although that’s certainly an option! Many craft bloggers actually make a lot of money selling digital products.
In my opinion, selling digital products is easier and more profitable!
Some digital products you can sell as a craft blogger include patterns, such as Cricut patterns or knitting patterns. You can also sell online courses or guides teaching others how to master your particular craft.
Craft Blog Examples
Are you looking for examples of craft blogs?
Below I have listed some of the most successful craft blogs based on blog income reports they have shared. Looking at these income reports is a great way to get an idea of how you can make money with your craft blog.
Here are some well-monetized craft blogs to check out:
- I Heart Arts n Crafts: $4,045
- Arts and Classy: $4,509
- One Little Project: $7,315
- Sewrella: $9,755
- Crochetpreneur: $17,295
- The Shabby Creek Cottage: $25,319
These are all fantastic examples of successful craft blogs.
How to Start a Craft Blog Recap
So that’s all there is to it! Starting a craft blog is a lot of fun and very rewarding.
As a recap, here are the steps you need to take to start your own craft blog:
- Decide on your niche.
- Choose a domain name.
- Register for web hosting from Bluehost.
- Write 5 to 10 blog posts.
Good luck and happy blogging!
